3. Parallel COM Cable Connection
4. System Commissioning – App Operation
1. Installation Preparation
-
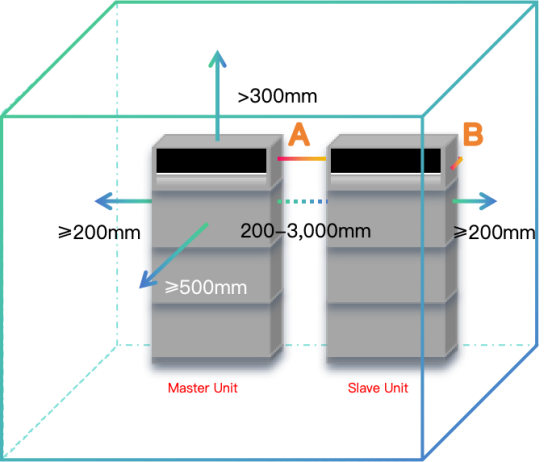
Spacing:
-
Same requirement as for a single X1 system.
-
Ensure the COM ports (A & B) of Master and Slave modules are within 9m if not using parallel COM cable from Anker SOLIX.
(2) Battery Cable Connection:
-
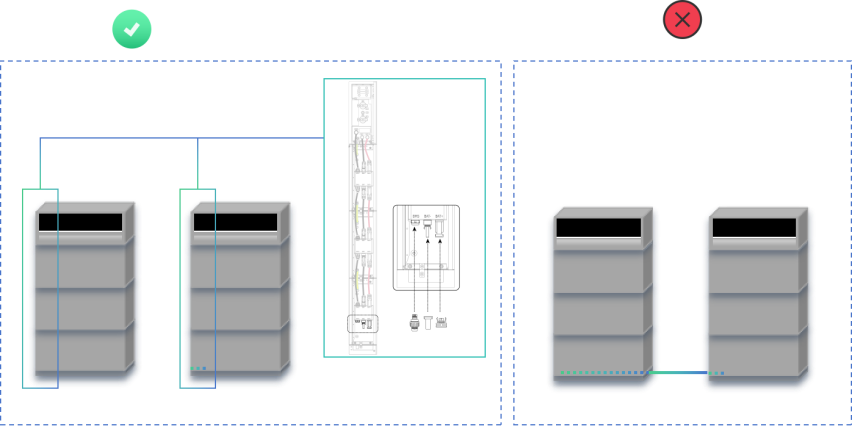
Battery power and signal cables connect as with a single unit.
-
Do not connect signal cables between battery packs of different modules.
(3) PV Connection:
-
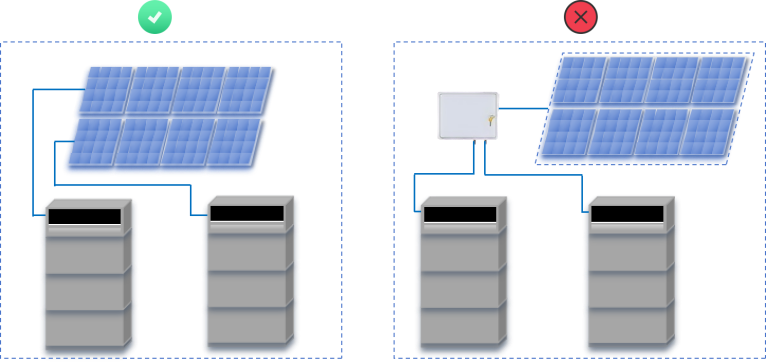
If no PV panels are connected yet, the Master can handle up to the single-system maximum PV input.
-
One PV array must not be shared between Master and Slave modules.
-
Follow single-unit wiring details.
(4) AC Grid and Backup Ports:
-
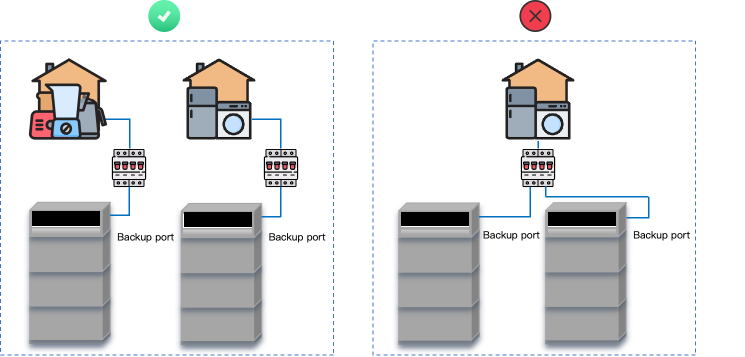
Each Power Module’s Grid port must connect to an RCD-equipped circuit breaker before paralleling to the grid.
-
Backup ports must be wired separately — do not connect them in parallel.
(5) Power Sensor and Dongle:
-
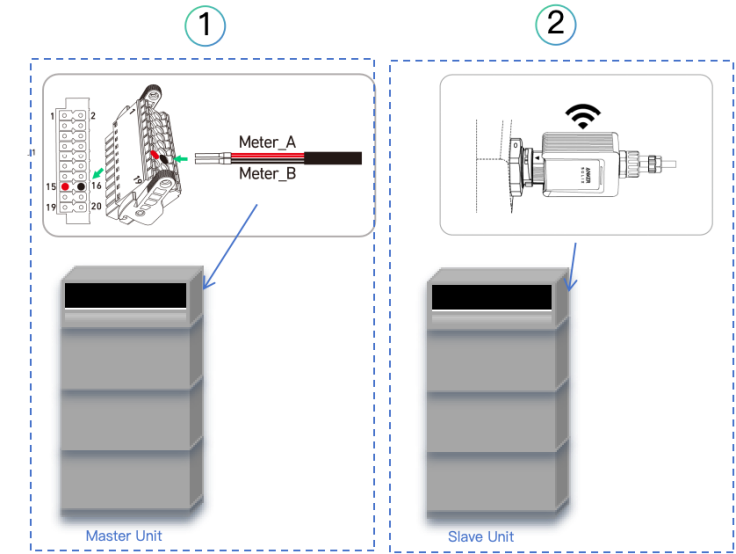
Connect the power sensor to the Master module only.
-
Plug one dongle into the Slave module (for firmware update).
2. Firmware Update
⚠️ Important: Do not connect the COM cable until both modules are fully updated.
Step-by-step:
(1) Power on both Master and Slave modules and their batteries.
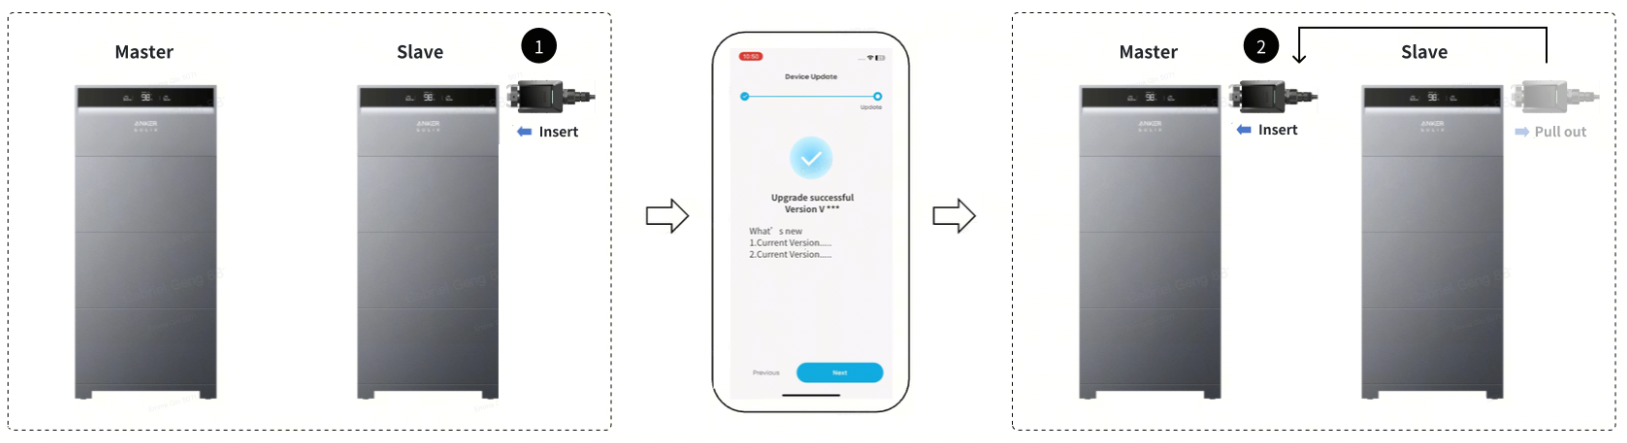
(2) Make sure the dongle is inserted into the Slave module.
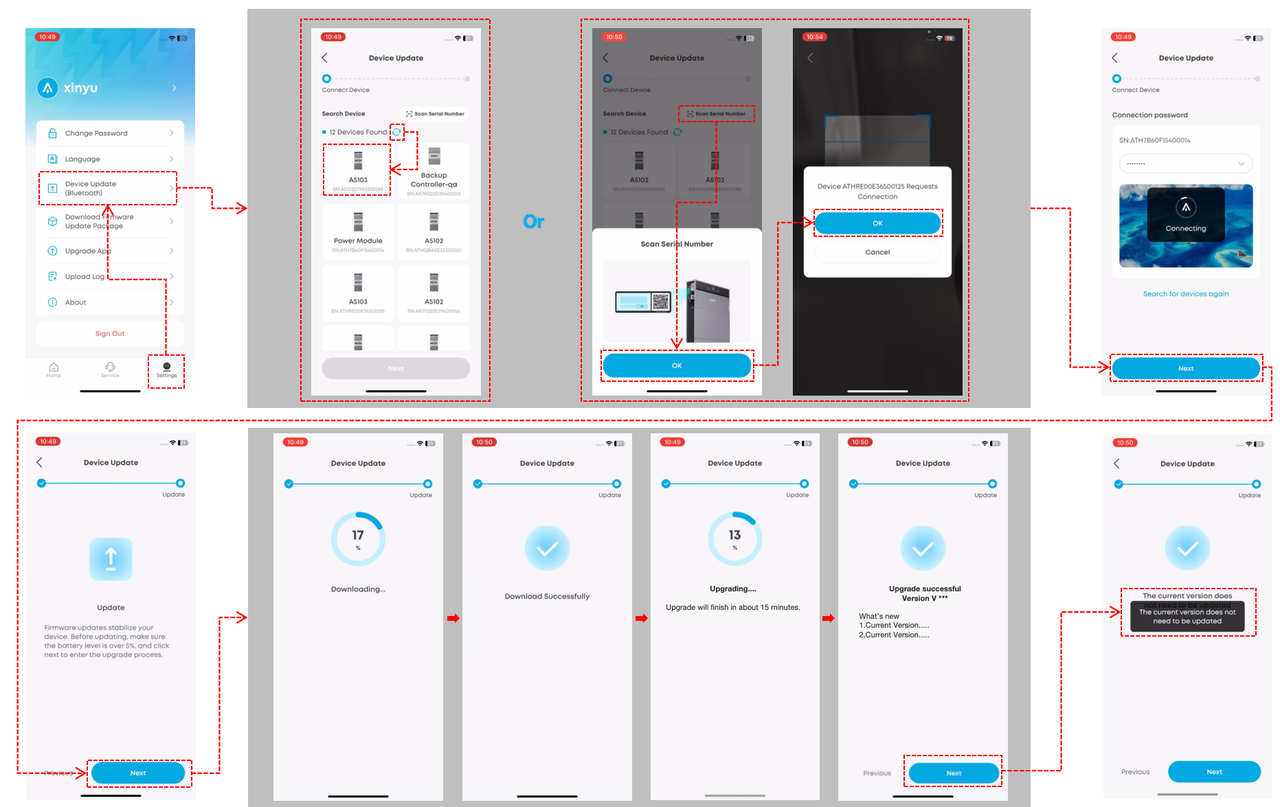
(3) Open the AnkerSOLIX App
-
Go to Settings → Device Update (Bluetooth)
(4) Follow the procedure below:
-
Connect devices (auto discovery or scan SN)
-
Tap OK
-
Enter the connection password
-
Tap Next after connection
-
Installs the firmware automatically
-
Wait until the update completes successfully
(5) After finishing Slave update:
-
Remove the dongle from Slave
-
Insert it into Master
-
Repeat the same update process
-
After completion, keep the dongle in the Master module
Note Battery SOC Requirements for Firmware Update:
-
Firmware Update cannot start if SOC < 5 %.
-
To charge: keep the system connected to mains supply.
-
Charging stops automatically once SOC reaches ≈8 %.
-
Proceed with firmware update after this charging step.
3. Parallel COM Cable Connection
Condition: Both modules must have firmware version ≥ V1.0.11.X
(1) Prepare the COM cable.
-
Make sure wire sequence meets the required specification.
-
Recommended total cable length ≤ 9 m.
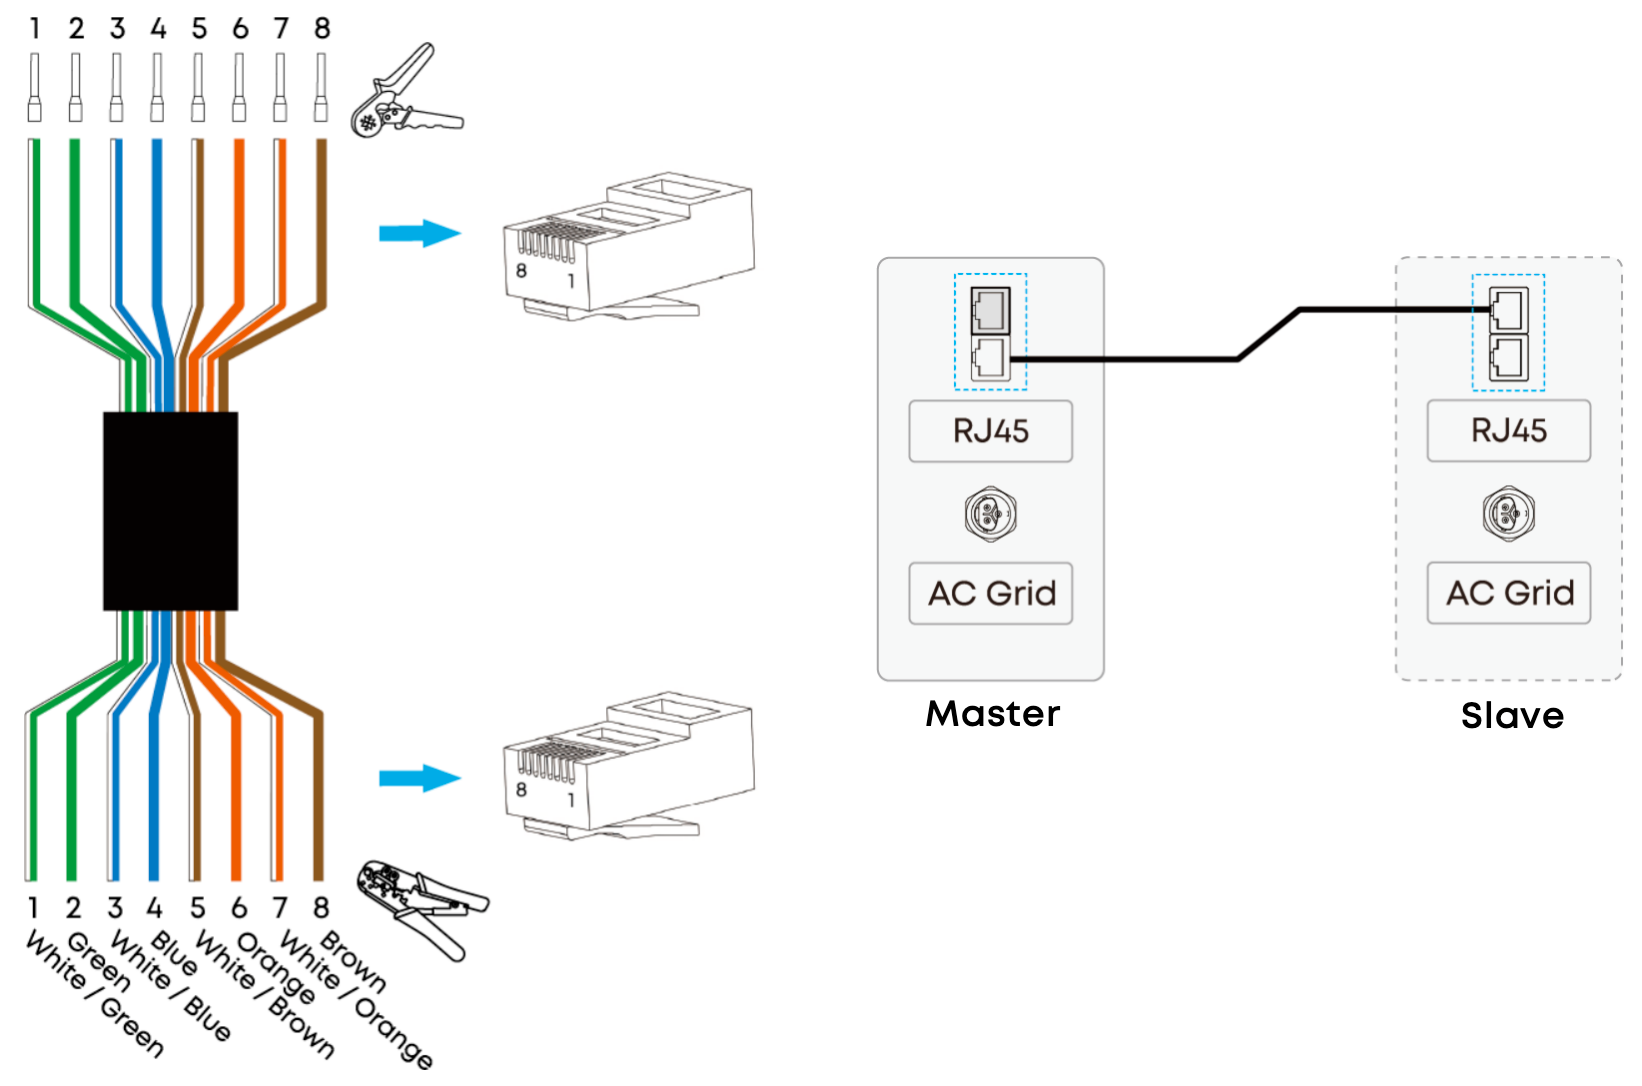
(2) Connect COM cable (SKU: A5682G14):
-
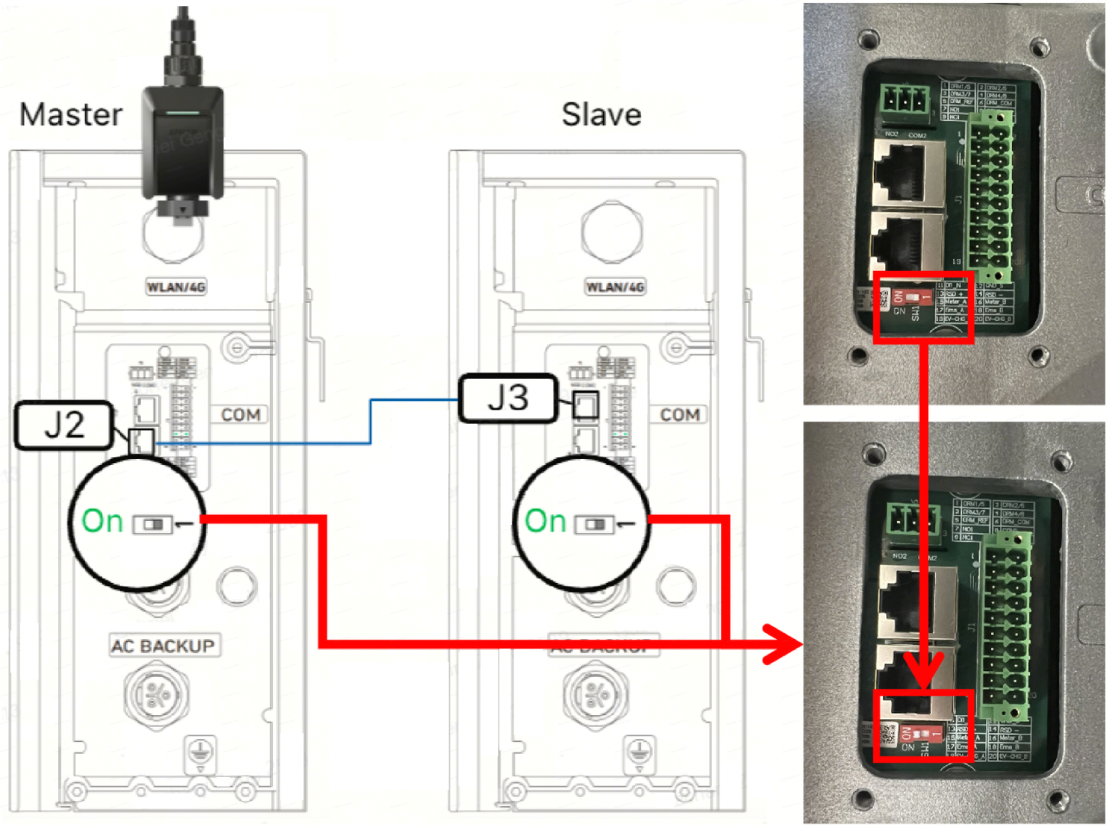
Master J2 ↔ Slave J3
(3) Set DIP switches on both modules to ON.
4. System Commissioning – App Operation
⚠️ Important: Please make sure the SOC showed on the paired power modules are exactly the same.
Select the workflow based on the installation case 👇
A. Two brand-new systems (first-time parallel setup)
(1) On the app’s Home screen → tap Create System (or "+" icon).
(2) Enter 01 System Build, follow the single-module setup steps.
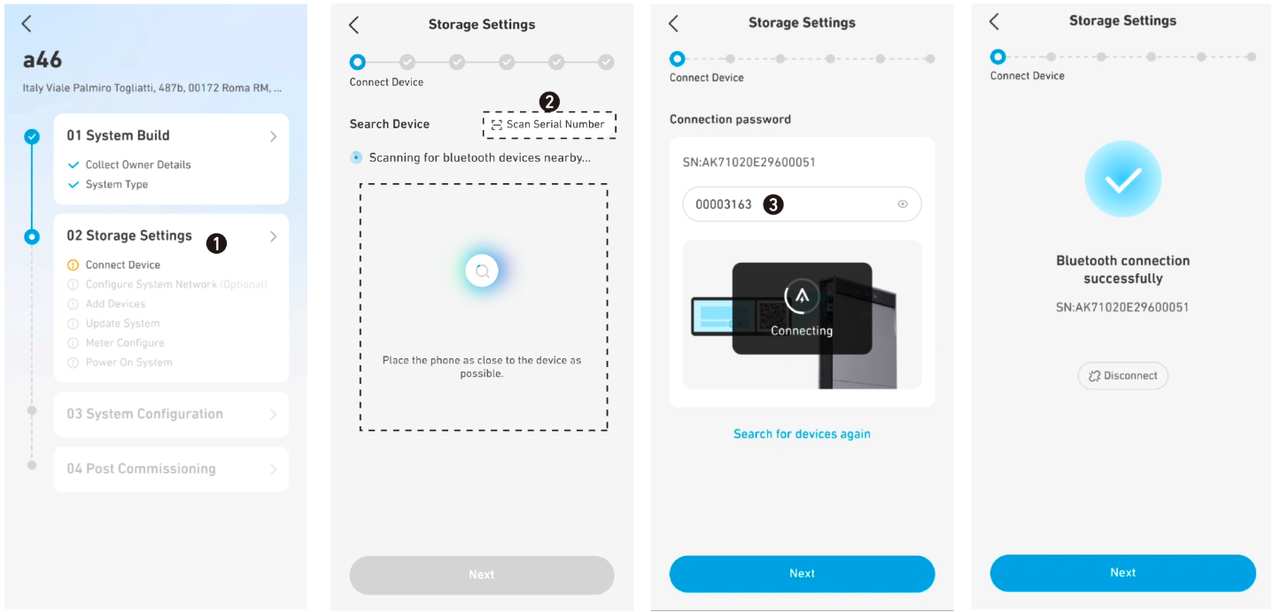
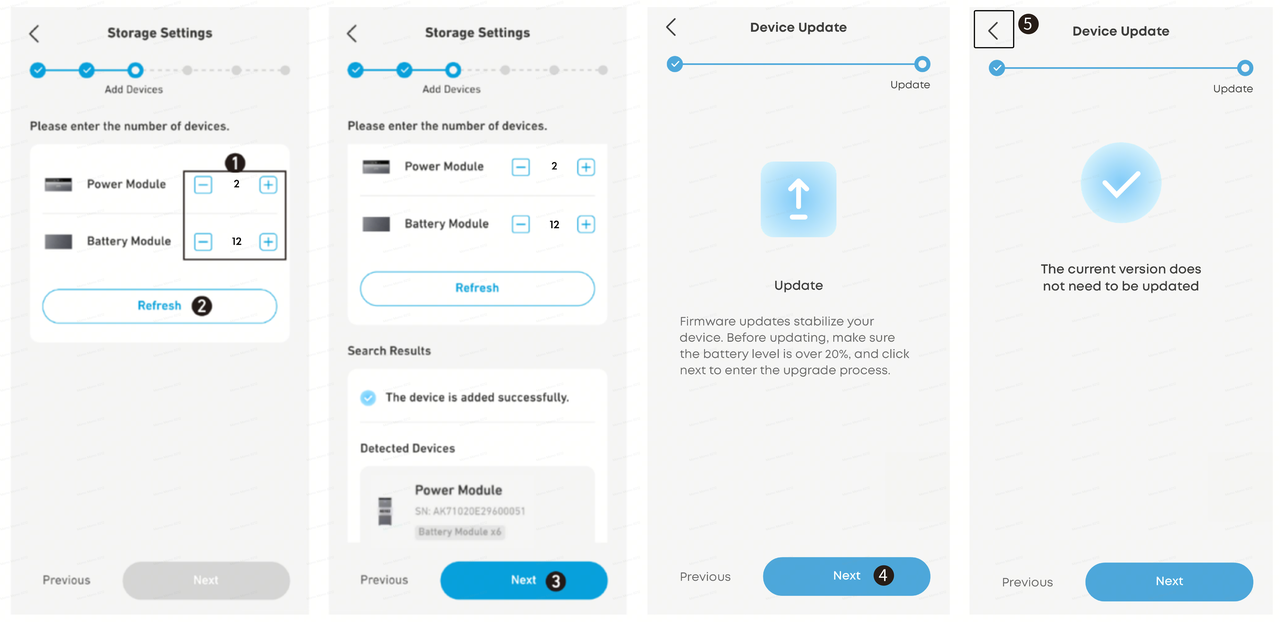
(3) When adding equipment, ensure 2 Power Modules are selected for parallel operation.
(4) After adding the correct number of modules → tap Next → Device Update page appears.
(5) Complete firmware upgrade → tap Back, continue commissioning steps.
B. Expanding an existing system (same installer account)
(1) On the Home screen → search for the existing system.
(2) Enter 02 Storage Settings – Add Devices.
(3) Modify the number of Power Modules to 2.
(4) Continue normal commissioning steps.
C. Expanding an existing system (under different installer account)
(1) Provide the System IDs and the new installer's company name to Anker SOLIX Support to transfer the site to the new installer;
(2) Follow Step B
D. Re-commissioning two existing systems into one parallel system
(1) Providing the System IDs to Anker SOLIX support team to be cleared;
(2) Follow Step A
Appendix A
Important Notes ⚠️
-
If the Master fails, the Slave cannot operate in parallel.
-
If the Slave fails, the Master continues to work and uploads the Slave failure status to the cloud/App.
-
If “Clear Site” action is required, follow the commissioning flowchart and contact Anker SOLIX AU Support for guidance.
Version information
The version information of X1 is as follows: